Connecting FXS Interfaces using AudioCodes FXS Patch Panel
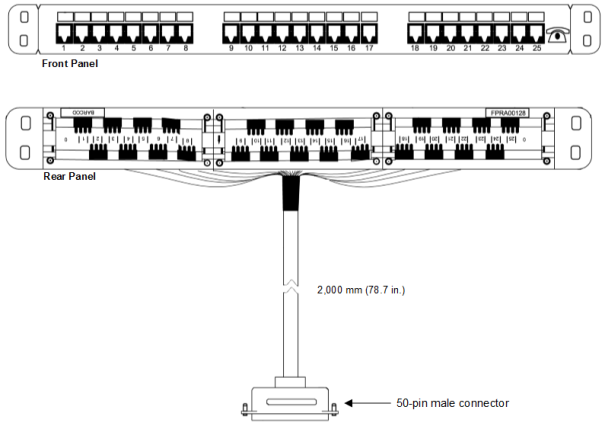
You can purchase AudioCodes' FXS Patch Panel (shown in the following figure) to connect the FXS interfaces to FXS equipment. The patch panel can be mounted in a 19-inch rack using integrated mounting brackets and provides a 2-meter (78.7 in.) extension cable with a 50-pin male connector for connection to the FXS port on the FXS blade. All incoming wires from the 50-pin Telco connector are terminated to the back of the patch panel. The FXS endpoints (e.g. telephones) can be plugged into the corresponding RJ-11 jacks on the front of the patch panel.
Orderable FXS Patch Panel
| ➢ | To connect the FXS interfaces using the FXS Patch Panel: |
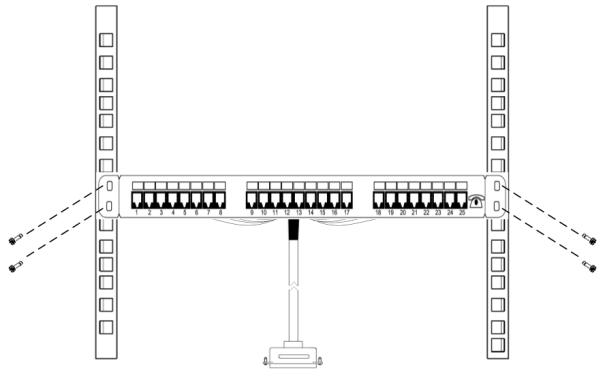
| 1. | Mount the Patch Panel in a 19-inch rack, using the integrated mounting brackets located on either side of the Patch Panel. Use four 19-inch rack bolts (not supplied) to securely attach the brackets to the front-rack posts. Make sure that the left and right mounting brackets are attached to the rack posts at the same level so that the patch panel is supported in a horizontal position. |
Mounting Patch Panel in Rack
| 2. | Connect the Patch Panel's 50-pin male connector to one of the FXS blade's 50-pin female Telco connectors located on the chassis' rear panel, and secure the connector with the two captive screws located on either side of the connector, using a flat-head screwdriver: |
Connecting 50-Pin Telco Connector to Port on FXS Blade

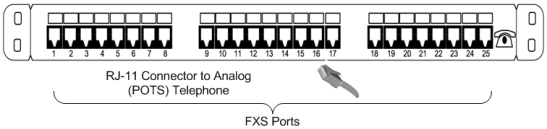
| 3. | Connect your analog equipment to the Patch Panel, by plugging the RJ-11 connectors into the RJ-11 sockets on the Patch Panel's front panel: |
Connecting Analog Equipment to FXS Patch Panel
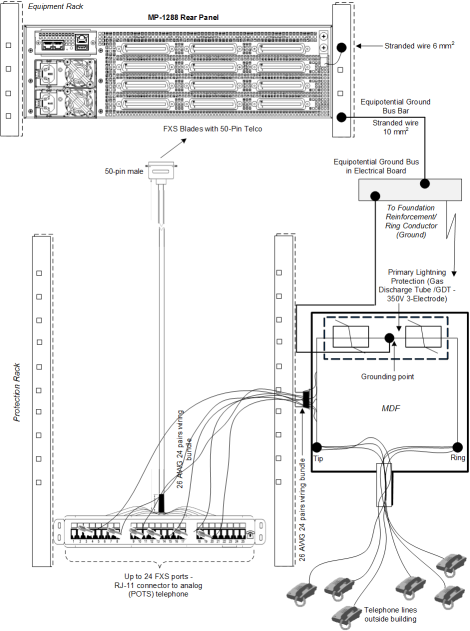
For outdoor FXS cabling installations, you must install additional power surge protection as illustrated in the following figure. For indoor FXS cabling installations, there is no need for primary lightning protection usage.
Connecting FXS Interfaces using FXS Patch Panel